
We will glue wood veneer “boards” over the plastic boards and weather the car to make it look realistic. Next month, we will show you how to build a custom pipe load using this same car. To customize a car like this one, you will need wood veneer that you can purchase online or at a wood working store. You will also need a paper cutter or razor knife, scissors, and some adhesive. You will need some materials to weather the car. We used black drawing ink, oil pastels, and a mud-colored acrylic paint. You will want some paper towels, a paintbrush, and cotton swabs for the weathering.
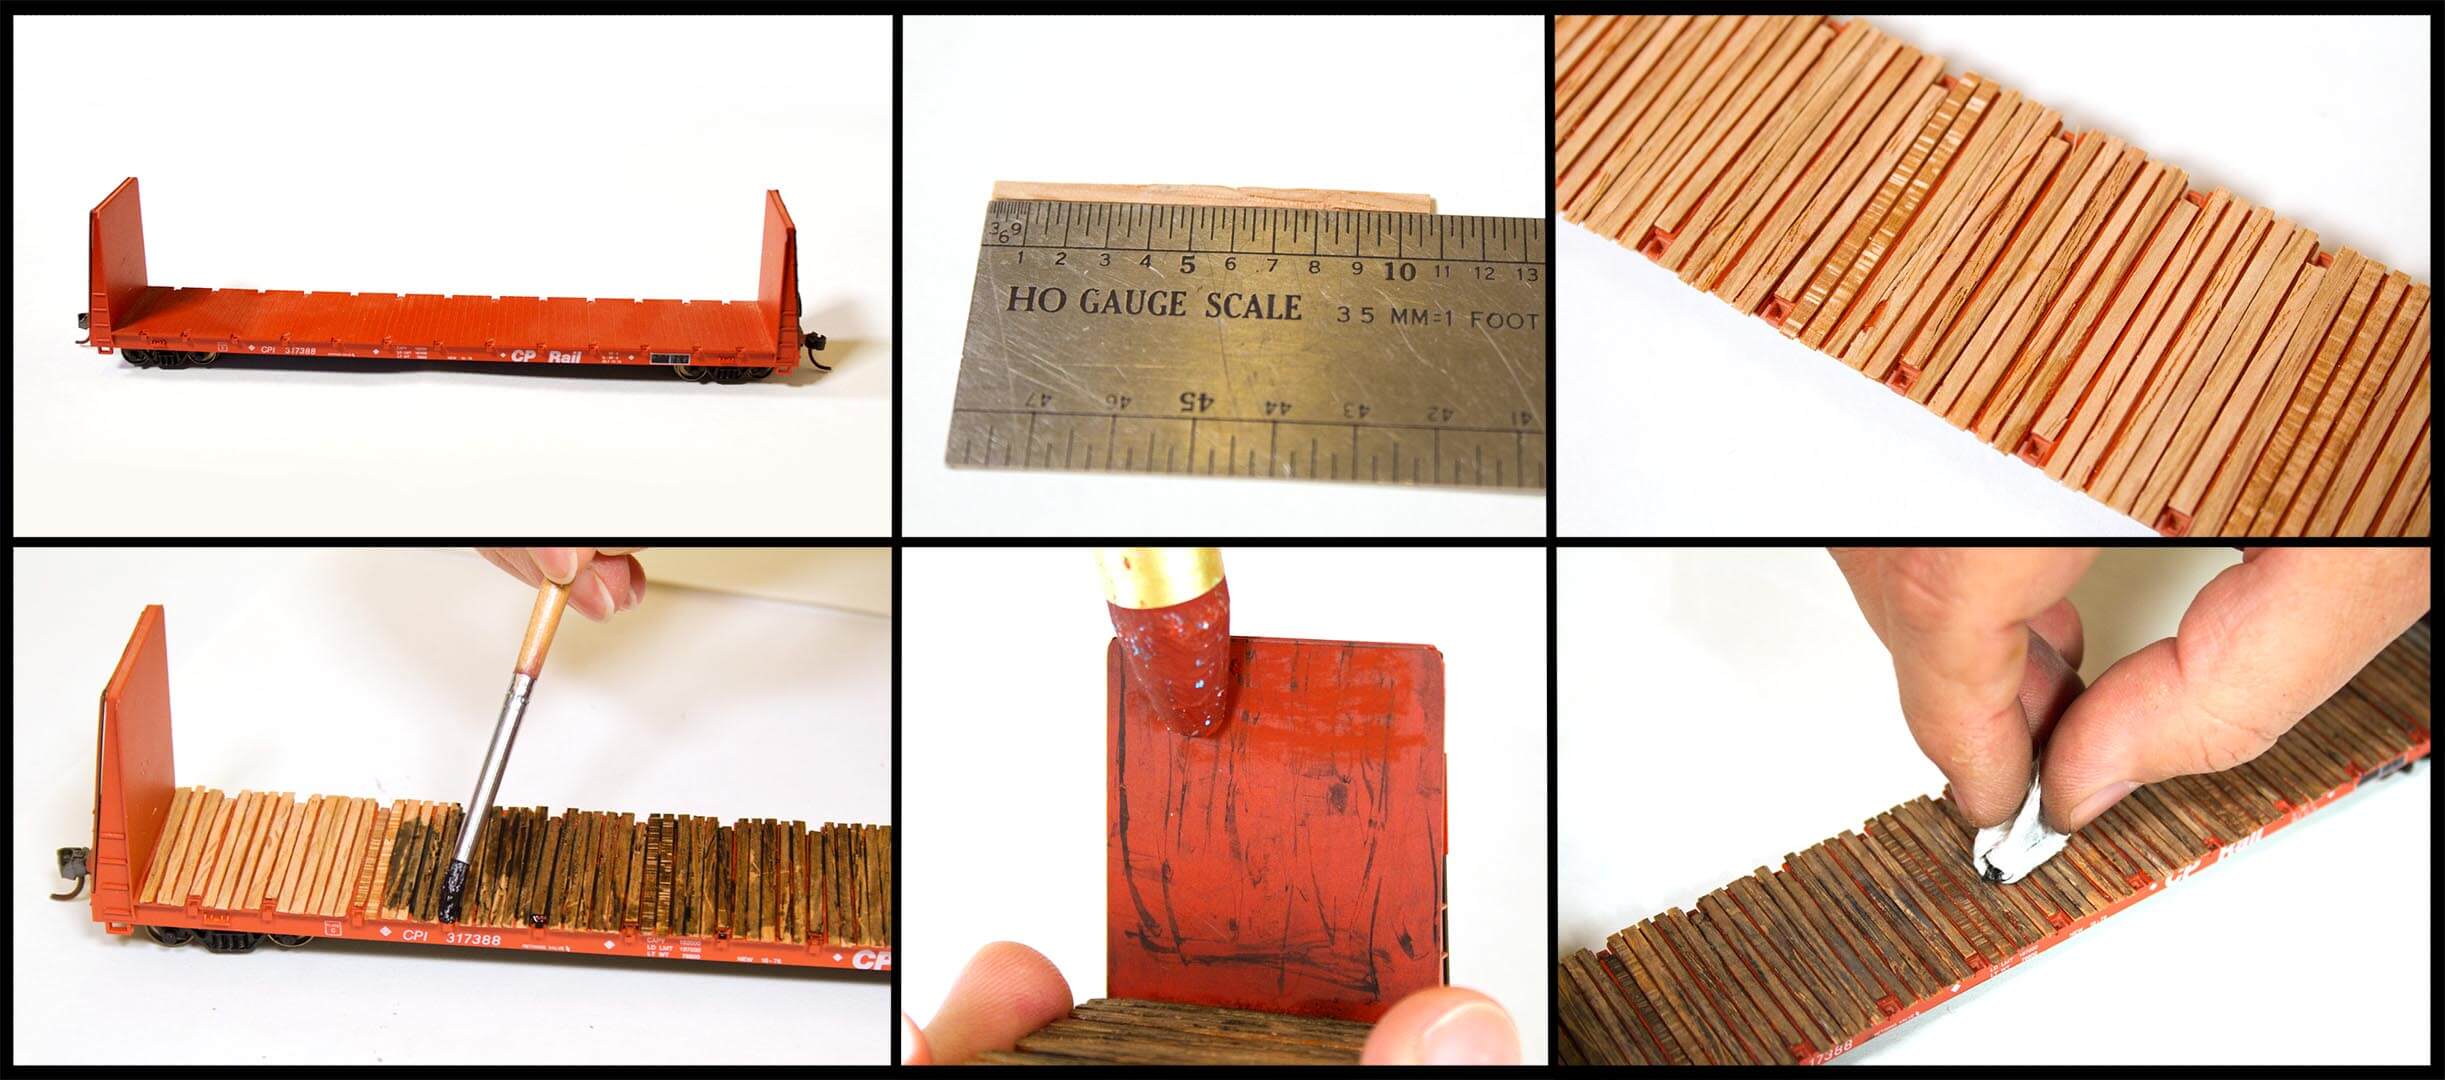
First, you will have to measure the width of the car you are modifying to determine how wide to cut the boards. Our car is a 60 footer that is 10 ½ scale feet wide. We cut boards just slightly longer than 10 ½ feet and glued them over the plastic molded boards on the model. You will need shorter boards where the tie-downs attach. On our car, those boards are nine scale feet long. We glued all the longer boards into place first and then cut nine foot boards and glued them into place. Superglue dries quickly and doesn’t make a mess. If you do get a little on the boards, it will resist the ink when you weather it. (A few spots like this can actually be good, as it can look like a gouge in the boards.) We used a few boards that have a wood grain that looks different than the majority in an effort to make it look like those boards were replaced when the car was repaired. We also used one that had a bit of a chunk out of it to look like a damaged board.
Once you have the boards glued in place, you can start weathering. We started with a dark ink wash and wiped off the excess. We then added a few drops of ink to darken a few of the crevices in between the boards. We weathered the inside ends of the car with the same ink. We used it at 100% strength, applying it on the end with a toothpick and then smearing it upward with a paper towel. We used oil pastels as rust, then added a bit more ink and smeared it.
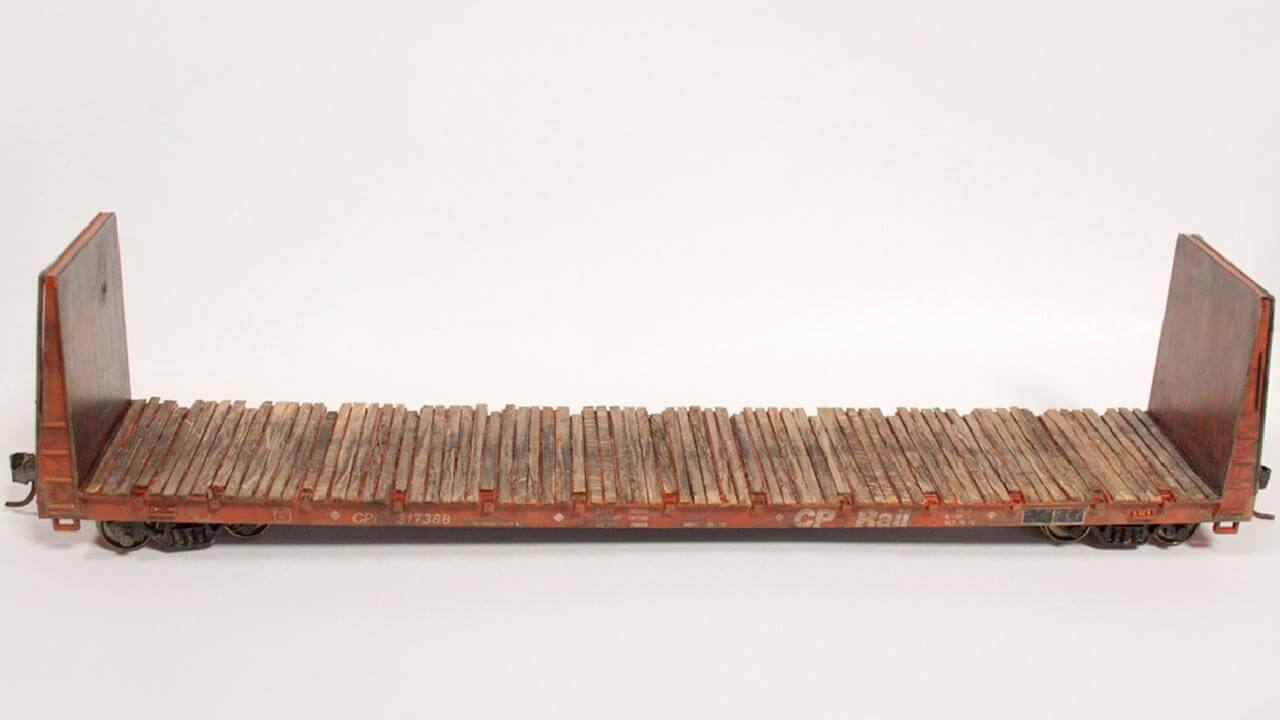
On the sides of the car and the outside ends, we used the watered-down black ink and a watered-down mud-colored acrylic paint, applying both with a cotton swab in thin layers. Don’t forget to weather the trucks. Once the car is dry, you may want to lightly spray it with a clear, flat sealant. This car will look good on any layout as an empty car or with a custom load. We will show you how to make a custom pipe load for it next month, so if you make it, hold onto it to add the load in February. Follow the steps in the the January 2018 issue of Trackside Model Railroading to complete your own car.
This is how our model turned out when applying the steps in the article.–TS
To get your copy of this months magazine you can visit here for more information on this issue and purchasing options. This magazine is also available on a two disc DVD set. This set has the full month on DVD video for your television attached DVD player along with a second disc that includes both the digital magazine and HD videos in a data disc format for your computer. You can always just purchase the digital download for $2.49 USD or subscribe to our magazine at $1.25 USD per month.
To read only online the lite Free Edition will be out on the 20th of January 2018 and will be available for 90 days when you sign up for a free account.
Interested in model railroads, sign up here to get free content.